What Apple iOS 8 Manual Camera Controls Means For The Masses

So as we already know, Apple has opened up it’s manual camera controls for developers and users in it’s new iOS 8. What this means for pro photographers is that they can finally take charge of their images similar to the way that they’re used to with their professional gear. What this means for amateur photographers and those who use their iPhone to snap their lives’ memories, is that they’re going to be insanely confused at first and wonder what the hell it all means and why can’t they just point and click like they were used to. But then, as they start to play with it all, they’ll realize they’re getting better images, and start to wonder why. So, to minimize that time between ‘wtf’ and ‘oh wow,’ here is a quick breakdown of the Apple iOS 8 manual camera controls that developers will have access to - what it all means and what it all does:
1 Manual Focus - As anyone that has used one knows, iPhones already provide a great and mostly accurate focusing system. Chances are, your shot will focus where you want it to and it’ll look great. But sometimes, having that extra control over focus is what can add that extra punch to an image. For example, if you want to have the entire photo blurry for artsy purposes, you’ll need manual focus. If you want to focus on a detail that’s too small for the camera to pick up on, you’ll need manual focus. Apple finally provides that control with iOS 8. The fact that focus peaking is part of it is a HUGE plus. Basically, the screen will show colored pixels on the part that is in focus so you know you’re getting exactly what you want in focus.
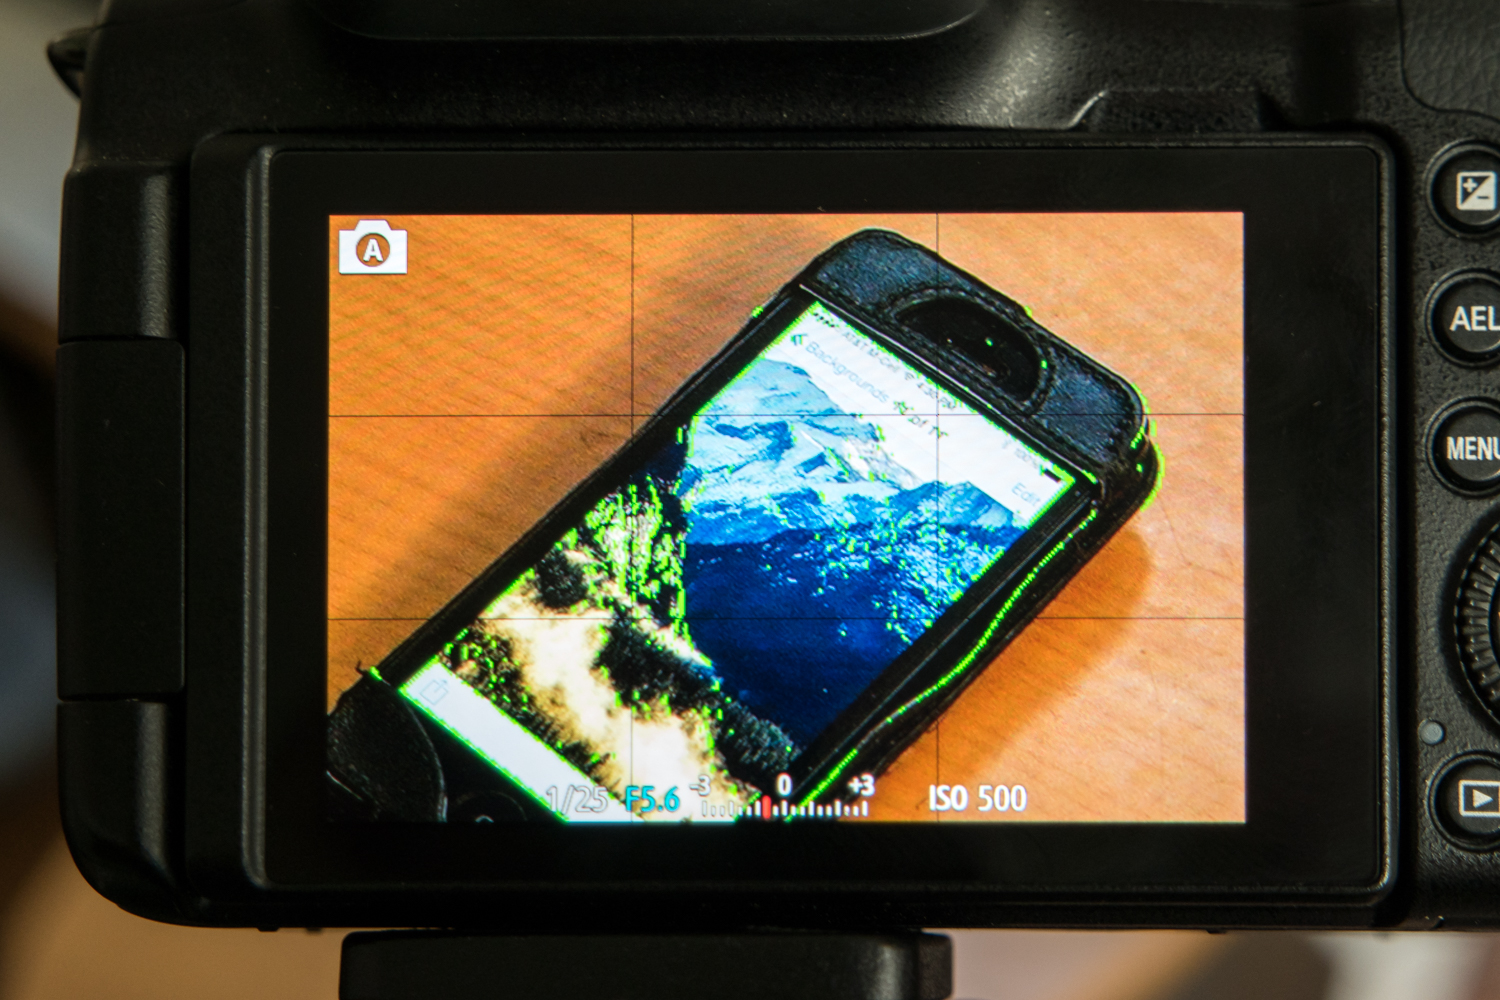
2 Manual Exposure - So as you compose your shot, you can now manually expose by sliding your finger up or down to increase or decrease exposure/brightness. Again, the camera does a great job already, but sometimes you want things brighter or darker, or you want to expose for a certain part of the scene while focusing on another. With iOS 8, you now have that control as well, putting you in charge of exactly what your image will look like, not what Apple thinks your image should look like.

3 Exposure Compensation - Most professional photographers live by Exposure Compensation. It’s why that little button lies so close to the top of the camera body for easy access on just about every single SLR or DSLR model available. Basically, instead of having to get too deep in the manual settings, if you need the scene just a bit brighter or darker, you can use exposure compensation to slightly make up for how you’d like the image to turn out by nudging it brighter or darker. It’s measured in ‘f-stops’, so basically, if you go up +1, it’ll double the brightness, if you go -1, it’ll halve the brightness.
4 ISO - This stands for International Standards Organization. You don’t need to know that. All you need to know is that when you increase the ISO, it increases the light sensitivity on the sensor, meaning, the higher the ISO number, the more light will be exposed to the sensor. Essentially, you can take pictures in lower light using a higher ISO. This also means that the shutter will fire faster, meaning, less time for a moving subject to be blurry, increasing the chance of capturing a sharp image. The trade-off is that, the higher the ISO, the more noise will show up in your images, basically, making them more grainy. However, by having this control manually, you’ll get the option to choose whether or not getting that shot in the bar is truly worth a bit of grain, versus not getting that shot at all.
5 Shutter Speed - Plainly put, shutter speed is exactly that...how fast the shutter fires, or, how much time it stays open to let light onto the sensor (take a picture). Some of those applications could range from long-shutter exposures to get that milky water or car-light-stream effects. Up until now, you had to rely on the camera deciding what is the best shutter speed to get a proper exposure for the image you're capturing, allowing little to creativity and experimentation with slow or fast shutter speeds. With Apple extending the API to include control over shutter speed, third party apps will have an easier task in allowing you to control this critical element of a photographic exposure. Provided you have a tripod, or some method to stabilize the iPhone (since anything slower that 1/60 of a second shutter speed will likely introduce some blur if handheld), you'll soon be able to get those milky water and car streamy lighty shots on your phone.
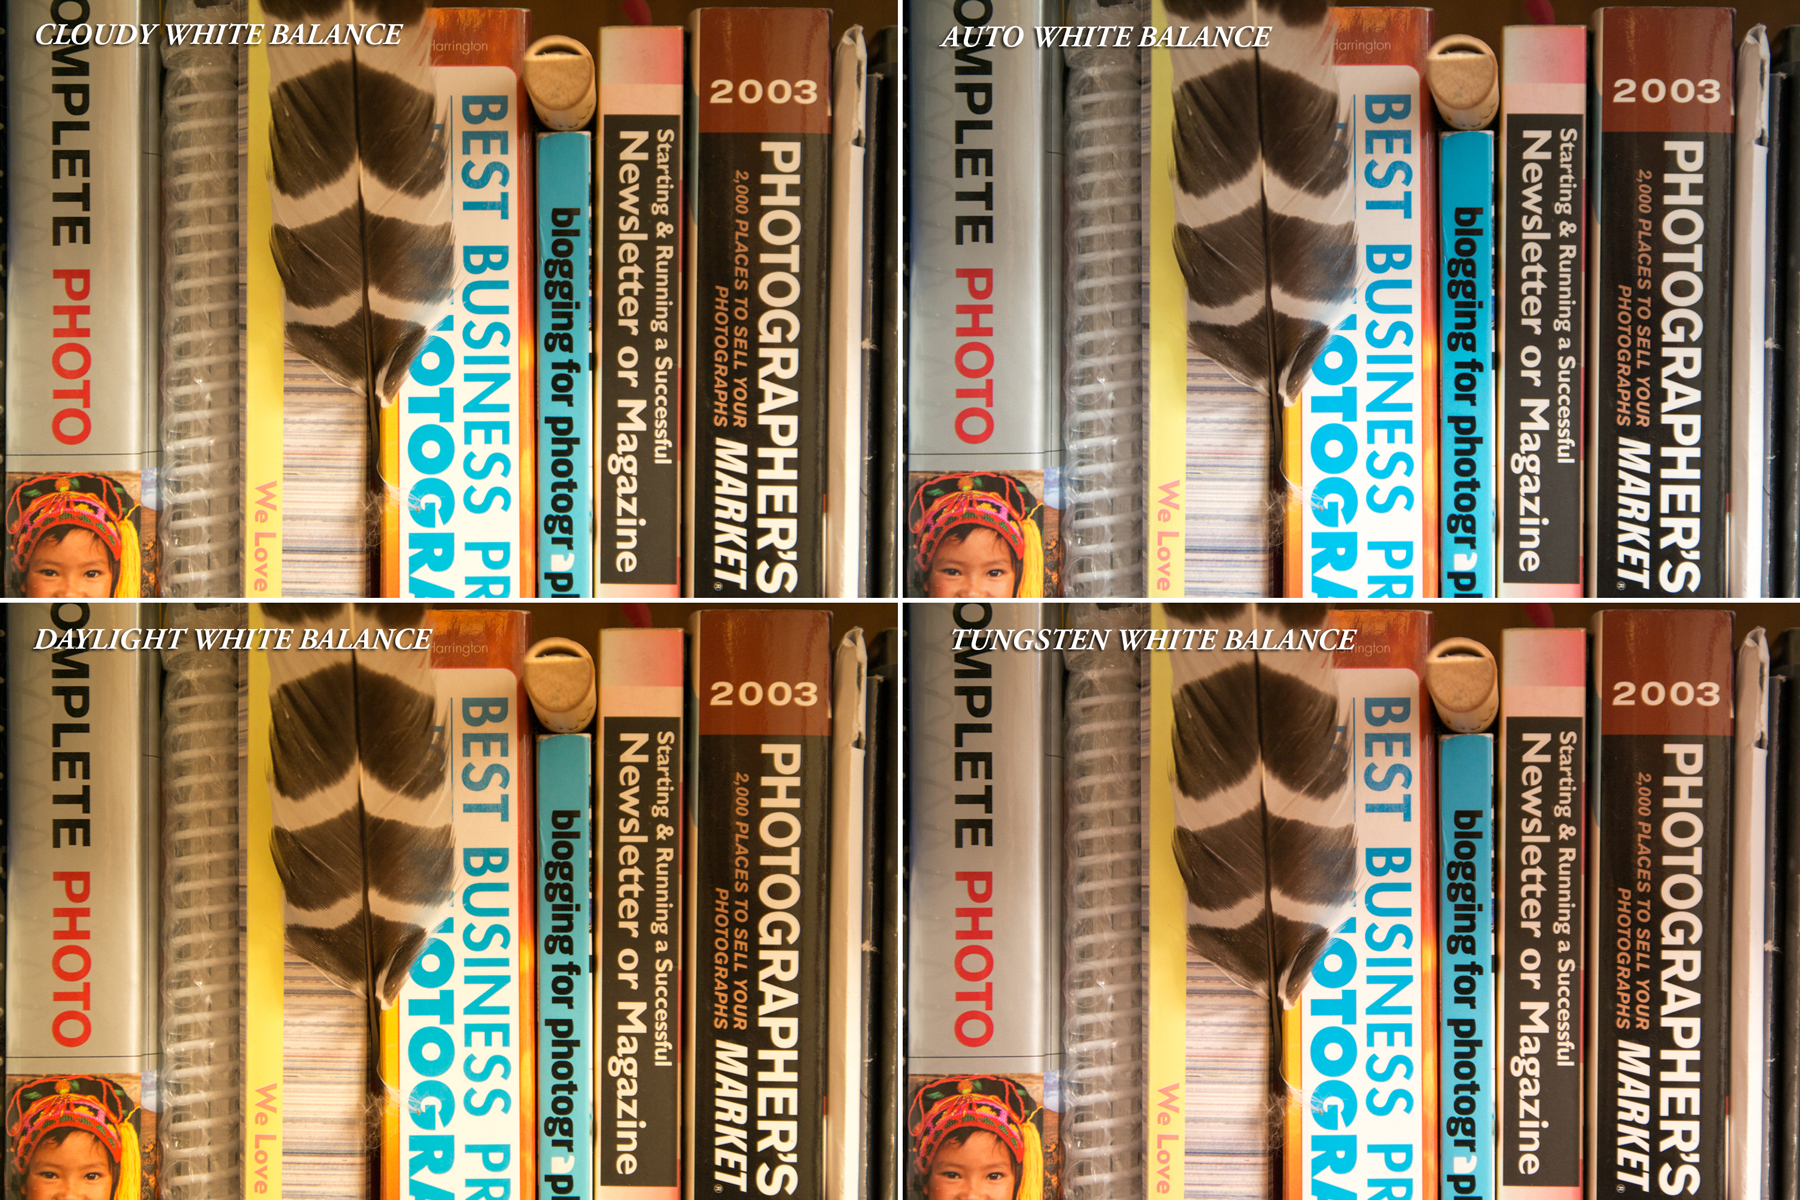
6 White Balance - Professional photographers have been fussing over white balance for as long as photography has existed. And now, iOS 8 users who aren’t familiar with the professional world, will find out why for themselves. While cameras have been becoming increasingly better at determining what true white point in an image is in order to give proper color to the rest of the image, they’re still not perfect. And with manual control over white balance, you can determine what sort of setting you’re shooting in, and modify and adjust white balance to make sure the whites are white and the other colors in the image follow suit.
The best part of all this is that Apple has left the camera open to 3rd party developers as well, so we’re going to start seeing some features that have existed in high-end DSLRs and mirror less cameras, show up on our iPhones. As a matter of fact, as of the writing of this post, ProCam has become the first app to already release a version, ProCam 2, taking advantage of much of these features.
And to find out why all this matters, check out my take on Why Apple iOS 8 Will Create Better Photographers.
For more of my madness: Instagram: @wasimofnazareth Twitter: @wasimofnazareth Google+: www.Google.com/+WasimMuklashy Facebook: www.Facebook.com/WasimOfNazareth