
When most people think sharpening in Photoshop, they understandably default to the ’Sharpen’ or ‘Unsharp Mask’ filters. But since I learned this trick a few years back, I don’t believe I’ve opened a single one of Photoshop’s native sharpen plugins a single time. Instead, I’ve relied on one of the ‘Other’ filters in that ‘Filter’ menu - the ‘High Pass’ filter. Essentially, you’ll make a duplicate layer of the image layer. Then navigate to the ‘Filter’ menu, down to ‘Other,’ and choose ‘High Pass.’ What you’ll see might startle you at first, but don’t worry, you’ll learn to love that gray mask that ‘ruined’ your picture in just a minute. Using that dialog box that pops up, I’ll usually enter a radius of between 2-5 pixels, depending on the image. The more sharp edges and lines I have in an image, the higher of that 1-5 scale I’ll go. Anymore above that will usually result in the dreadfully obvious over sharpened image. If you zoom in closely on the image, you can see exactly what is being sharpened and by how much. You can see the level of sharpening of those pixels through that grey mask on the image. In portraiture, I’m usually between 2-3 pixels at most, mostly to help accent eyelashes and eyeballs.

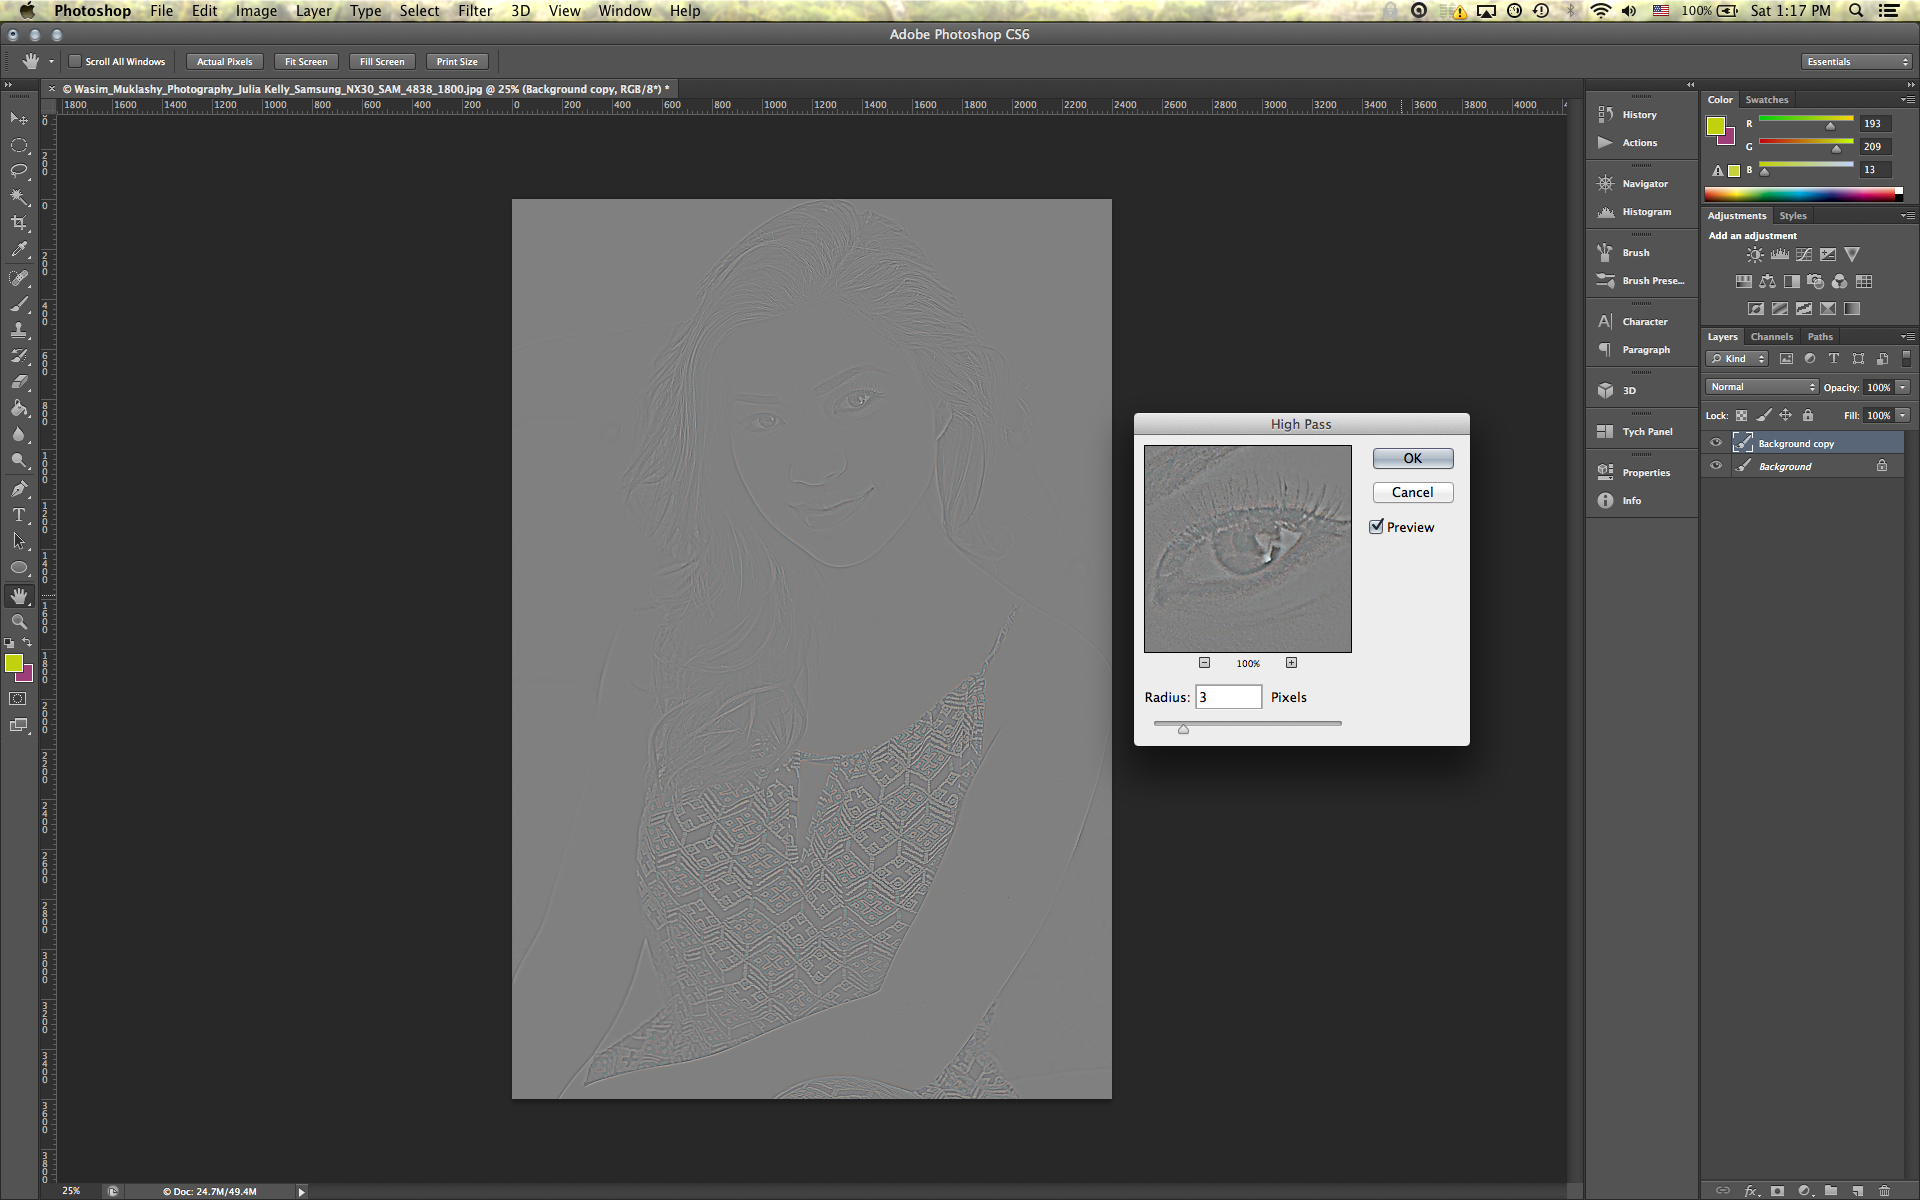
Once you decide how much sharpening you’d like, hit ‘Ok.’ Now the top layer will be that High Pass filter. Go to the ‘Blending Mode’ drop down menu above the filters, which is usually set at default to ‘Normal,’ and navigate through those options. I usually stick with ‘Soft Light,’ as it provides the most natural look, especially for portraits and architecture, however, you can play with the various other options, including ‘Vivid Light’ and ‘Hard Light.’ Once you scroll through them, you can see the different way each blending mode affects the high pass filter. The great part here is that you can also control the opacity of that layer, even further fine tuning the sharpening.

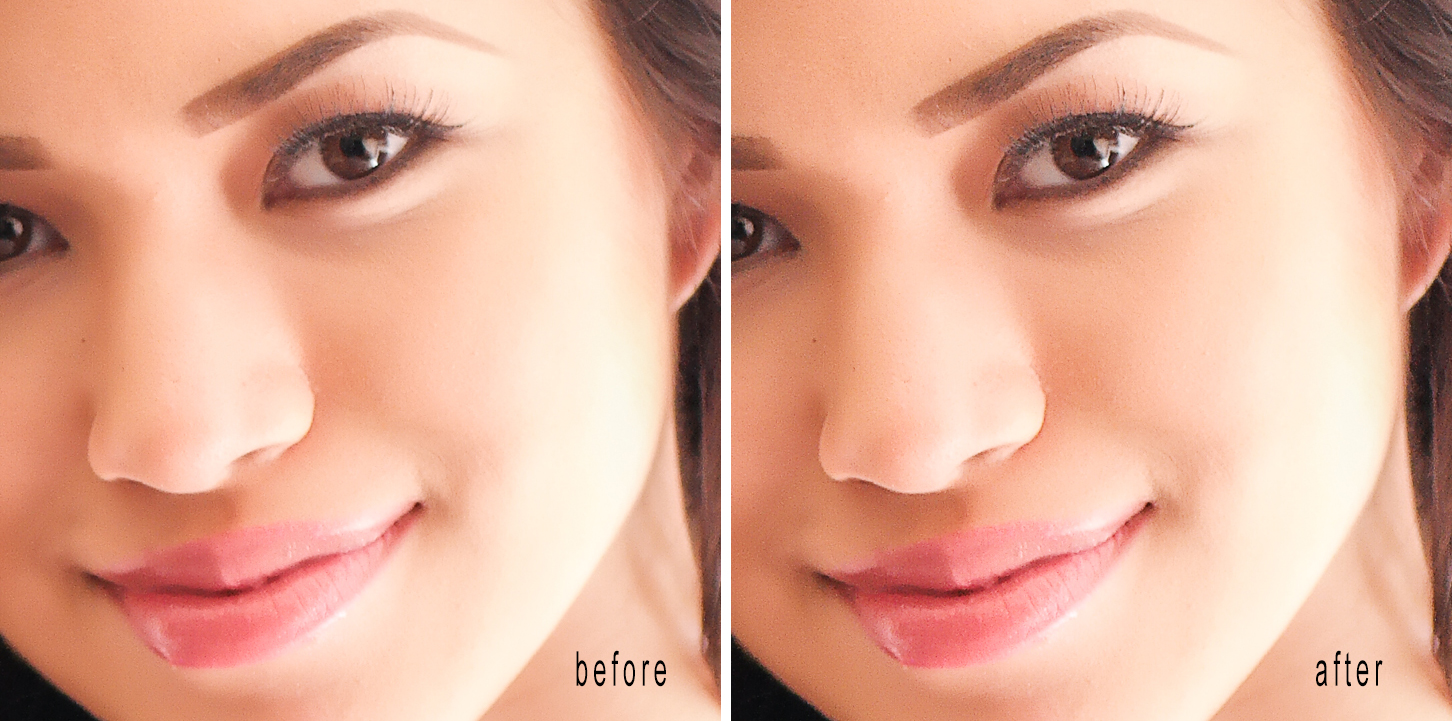
So that has become my preferred method of sharpening. It just seems to offer the most manual control over the sharpening process and once you get used to it, it’ll start to come as second nature. Here's the before and after, you can see it best in the eyes:
The image used here was shot on a Samsung NX30 with a Samsung 60mm/f2.8 lens. The model above is the stunning and popular social media star, Julia Kelly. You can find her on Instagram,Twitter, and Vine.
For more of my madness: Instagram: @wasimofnazareth Twitter: @wasimofnazareth Google+: www.Google.com/+WasimMuklashy Facebook: www.Facebook.com/WasimOfNazareth